
I’ve been dropping hints about this project for months and am beyond excited to finally write about it and share it. This was the most daunting project that I have ever taken on, but it might also be the most rewarding. I probably have just as many emotions about this dress as I have when I watch “Steel Magnolias”. I cried over it a little, but ultimately I am extremely happy about the outcome and very proud of myself. This was not an easy task and it’s not just something I would do for just anyone.
You see, I love Kat. She is an amazing person and friend. As she was planning her wedding she approached me with a task that she thought I could take on. At the time she obviously had more faith in me than I had in myself. She wanted me to turn her mom’s wedding dress into a reception dress for her. Ahhhhhh……… I knew it would be very difficult. My biggest fear was that I was going to mess up. You can mess up anything, but when you are up-cycling a wedding dress you have a limited amount of fabric. If you ruin the fabric, you are screwed. There is no more to work with!!! I don’t know how many days I looked at it and thought, “Maybe tomorrow I will be able to cut it.” I had to really work on my confidence before I started this bad boy.
I’ve been thinking about this blog post for a while and trying to figure out just how to write it. I often think in spider web form instead of in a linear fashion, but I want this blog to make sense. I believe I will just tell you what happened chronologically and try to leave out as many unnecessary things as possible. This is not really a “how to” blog because I truly believe you could never do 2 dresses like this exactly the same. It wouldn’t really be that important to give you instructions. I do however want to share with you the process, so let’s start at the beginning.

The first thing we did when she brought the dress over was play with the veil. A crown and floor length veil aren’t for everyone.

For real though, this thing was massively long and massively fluffy. Totally over the top! I actually didn’t end up using anything from the veil, but it was too fun not to share.
 This is the front of the dress. As you can see, it was damaged during the preservation process. My advice to every bride now…Don’t preserve your dress. I have actually heard of many horror stories about preserved dresses being ruined when they opened them up again.
 Here is the back. Can you imagine that train with that veil? It would be a little overkill now, but when her mom originally wore it, I’m sure it was quite lovely.

The beauty of this dress was actually in the detail. These lace appliqués are actually very very gorgeous.

This is the lining that was worn under the dress. You can’t see it in the picture, but this part actually feels a lot like plastic. I have no idea what it was made out of, but it was a little bit yucky.
After I had the dress and looked at it for about a week I decided to come up with a plan. One issue with this was that this dress was super tiny. Kat is very fit and athletic, but the waist of this dress must have been like 10 inches around. That might be an exaggeration, but you get my point. I couldn’t use the bodice of this original and change it. I had to create whole new dress from scratch. The good part though was that this dress was super long and I had plenty of fabric to work with even though I panicked at the beginning.
One day I was at Hobby Lobby and their patterns were on sale for a dollar. I don’t usually use a pattern, but I figured it would hurt to look through and see if there was something I couldn’t live without.

I found this pattern and I knew it was perfect. It would show off her awesome legs and her tattoos, just what she wanted. It also has a very fun vintage-y feel to it that would make it fit with her personality and the rest of her wedding. You can see where I drew on the pattern. I didn’t love the back and ended up changing it.
Time to get to work….

The first thing I did was disassemble the dress. I took off every piece of appliqué with a seam ripper. It was very time consuming because I didn’t want to ruin the appliqués or the fabric. I knew I would need almost everything.
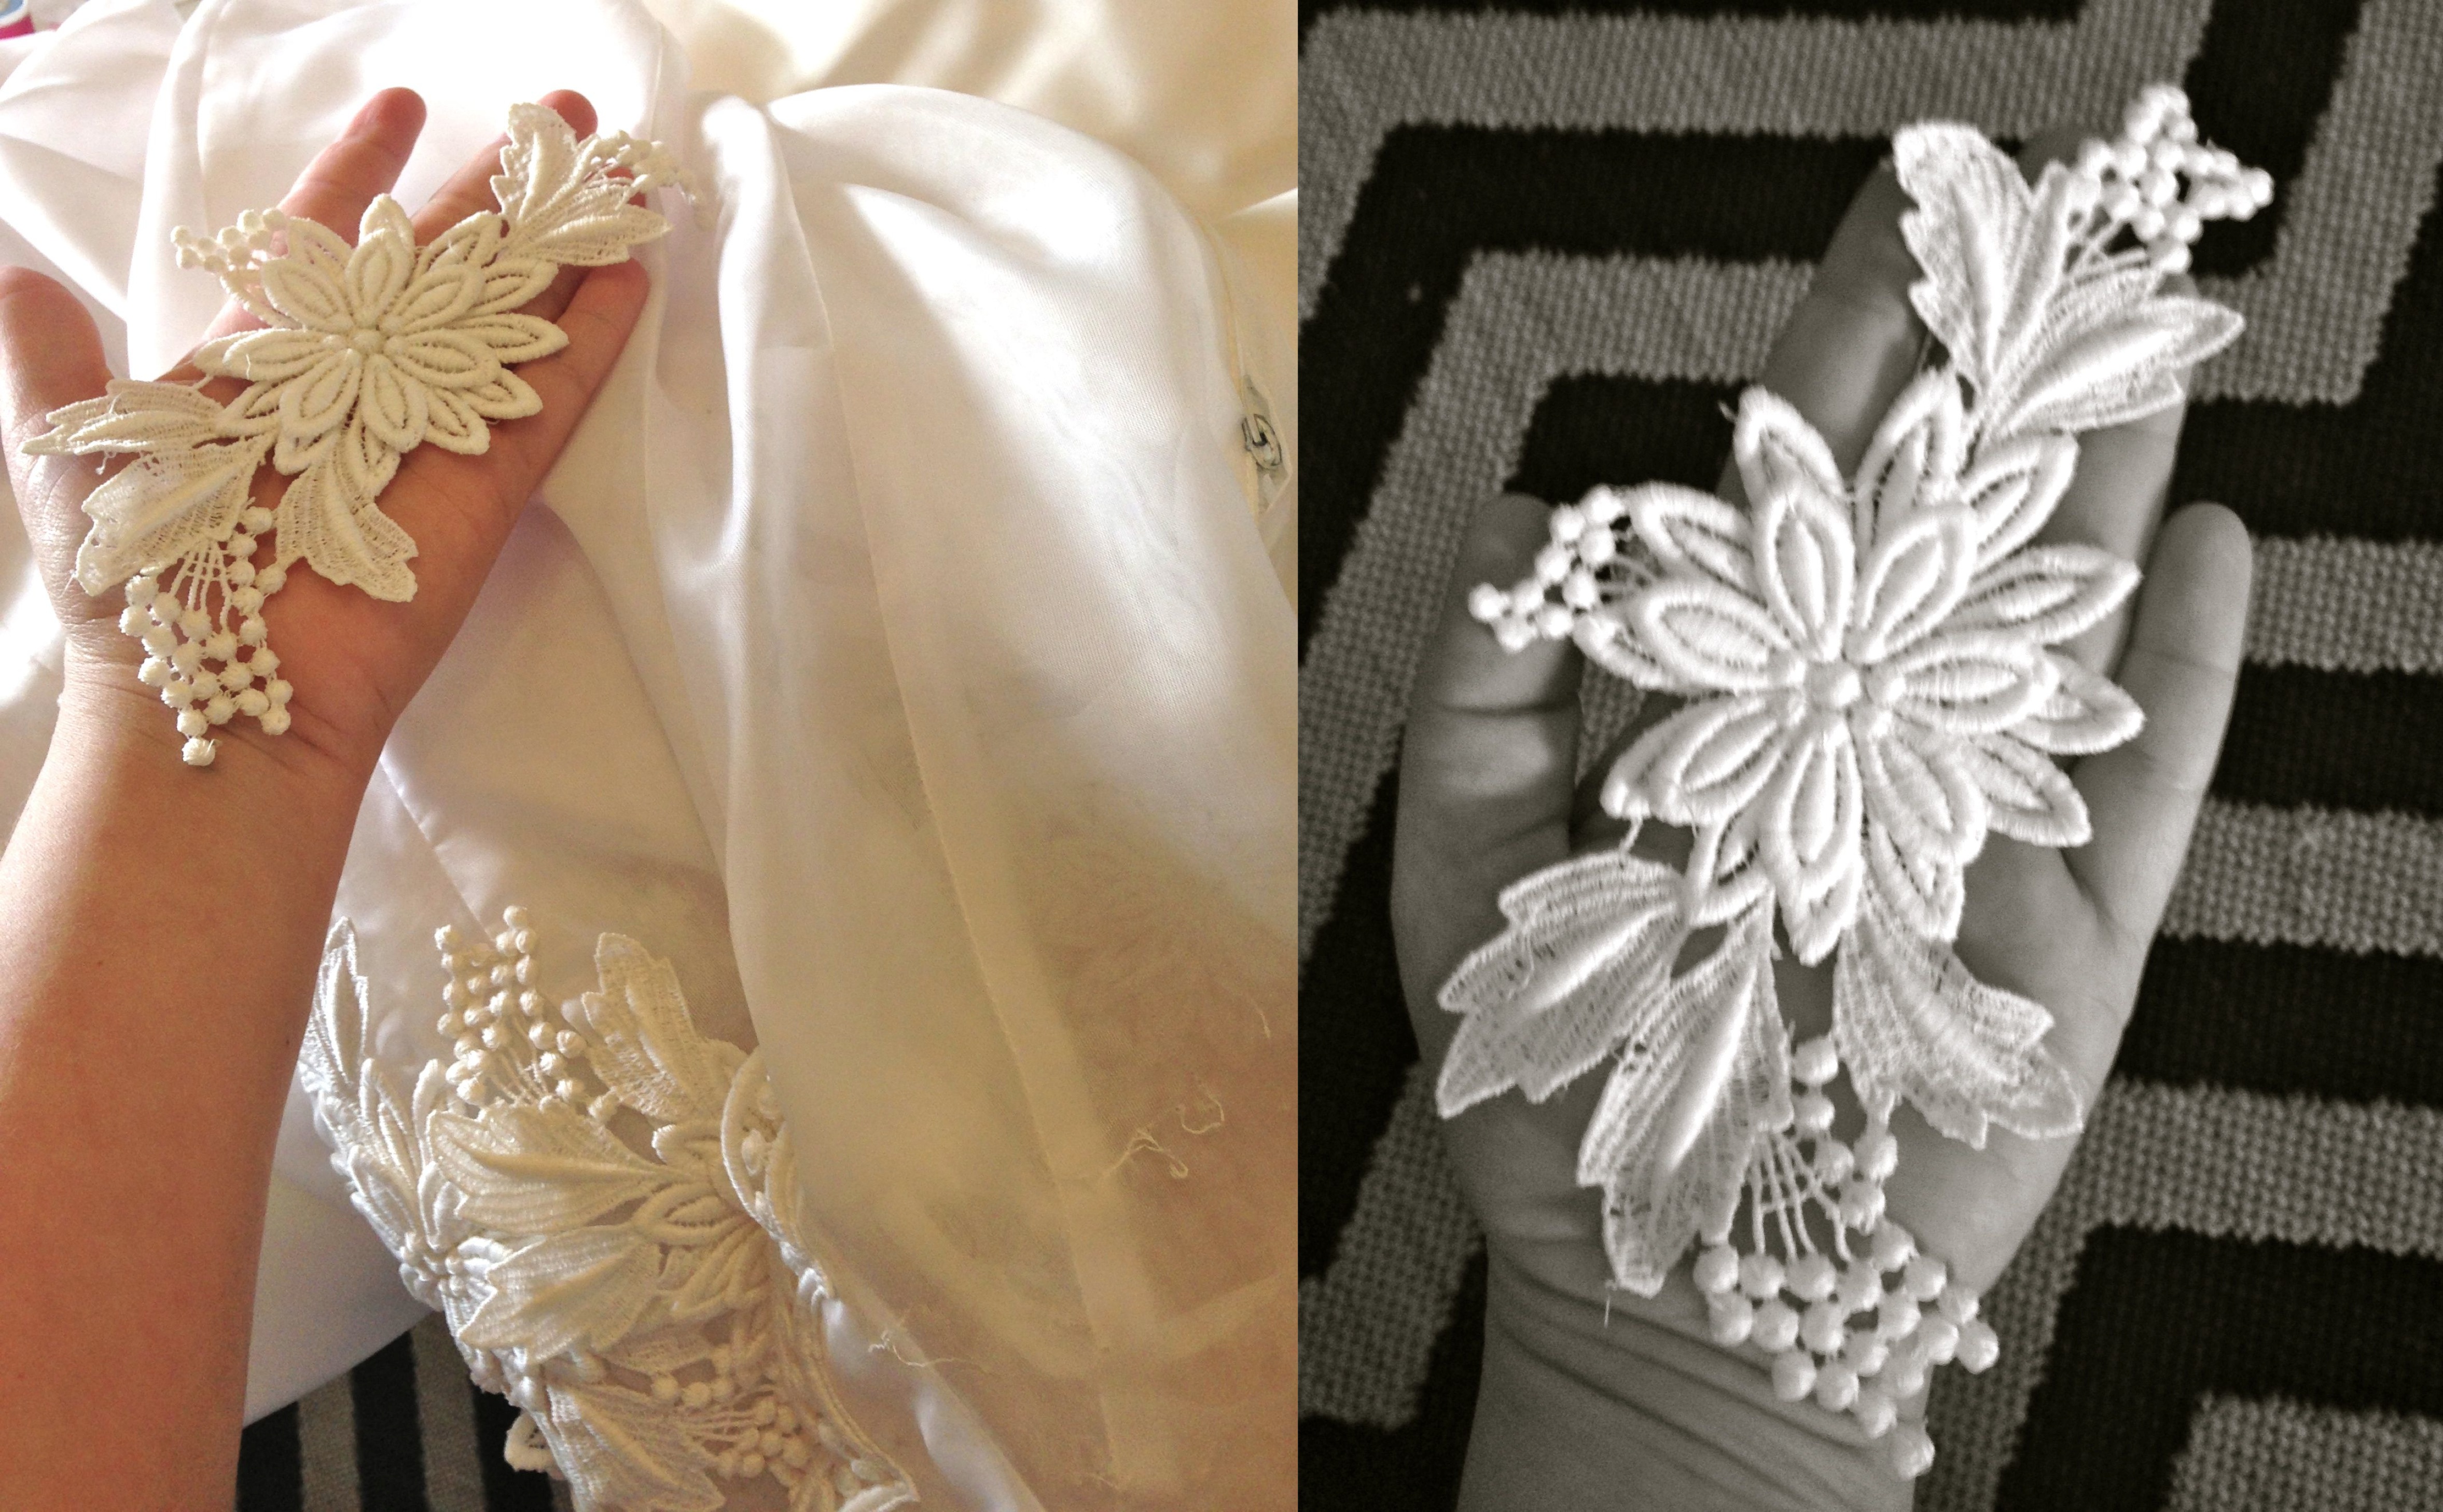 I told you the beauty was in the appliqués. These things were gorgeous and I just wanted to stick them all over my house because they made me smile.

After I took all the lace off I realized the dress was actually pretty dirty. Once again, it shouldn’t have been because it was preserved. I had to enlist my mom for some help on this one. I didn’t know how to clean everything with out ruining the pieces. One Sunday night after family dinner we gave all the pieces a Biz bath.
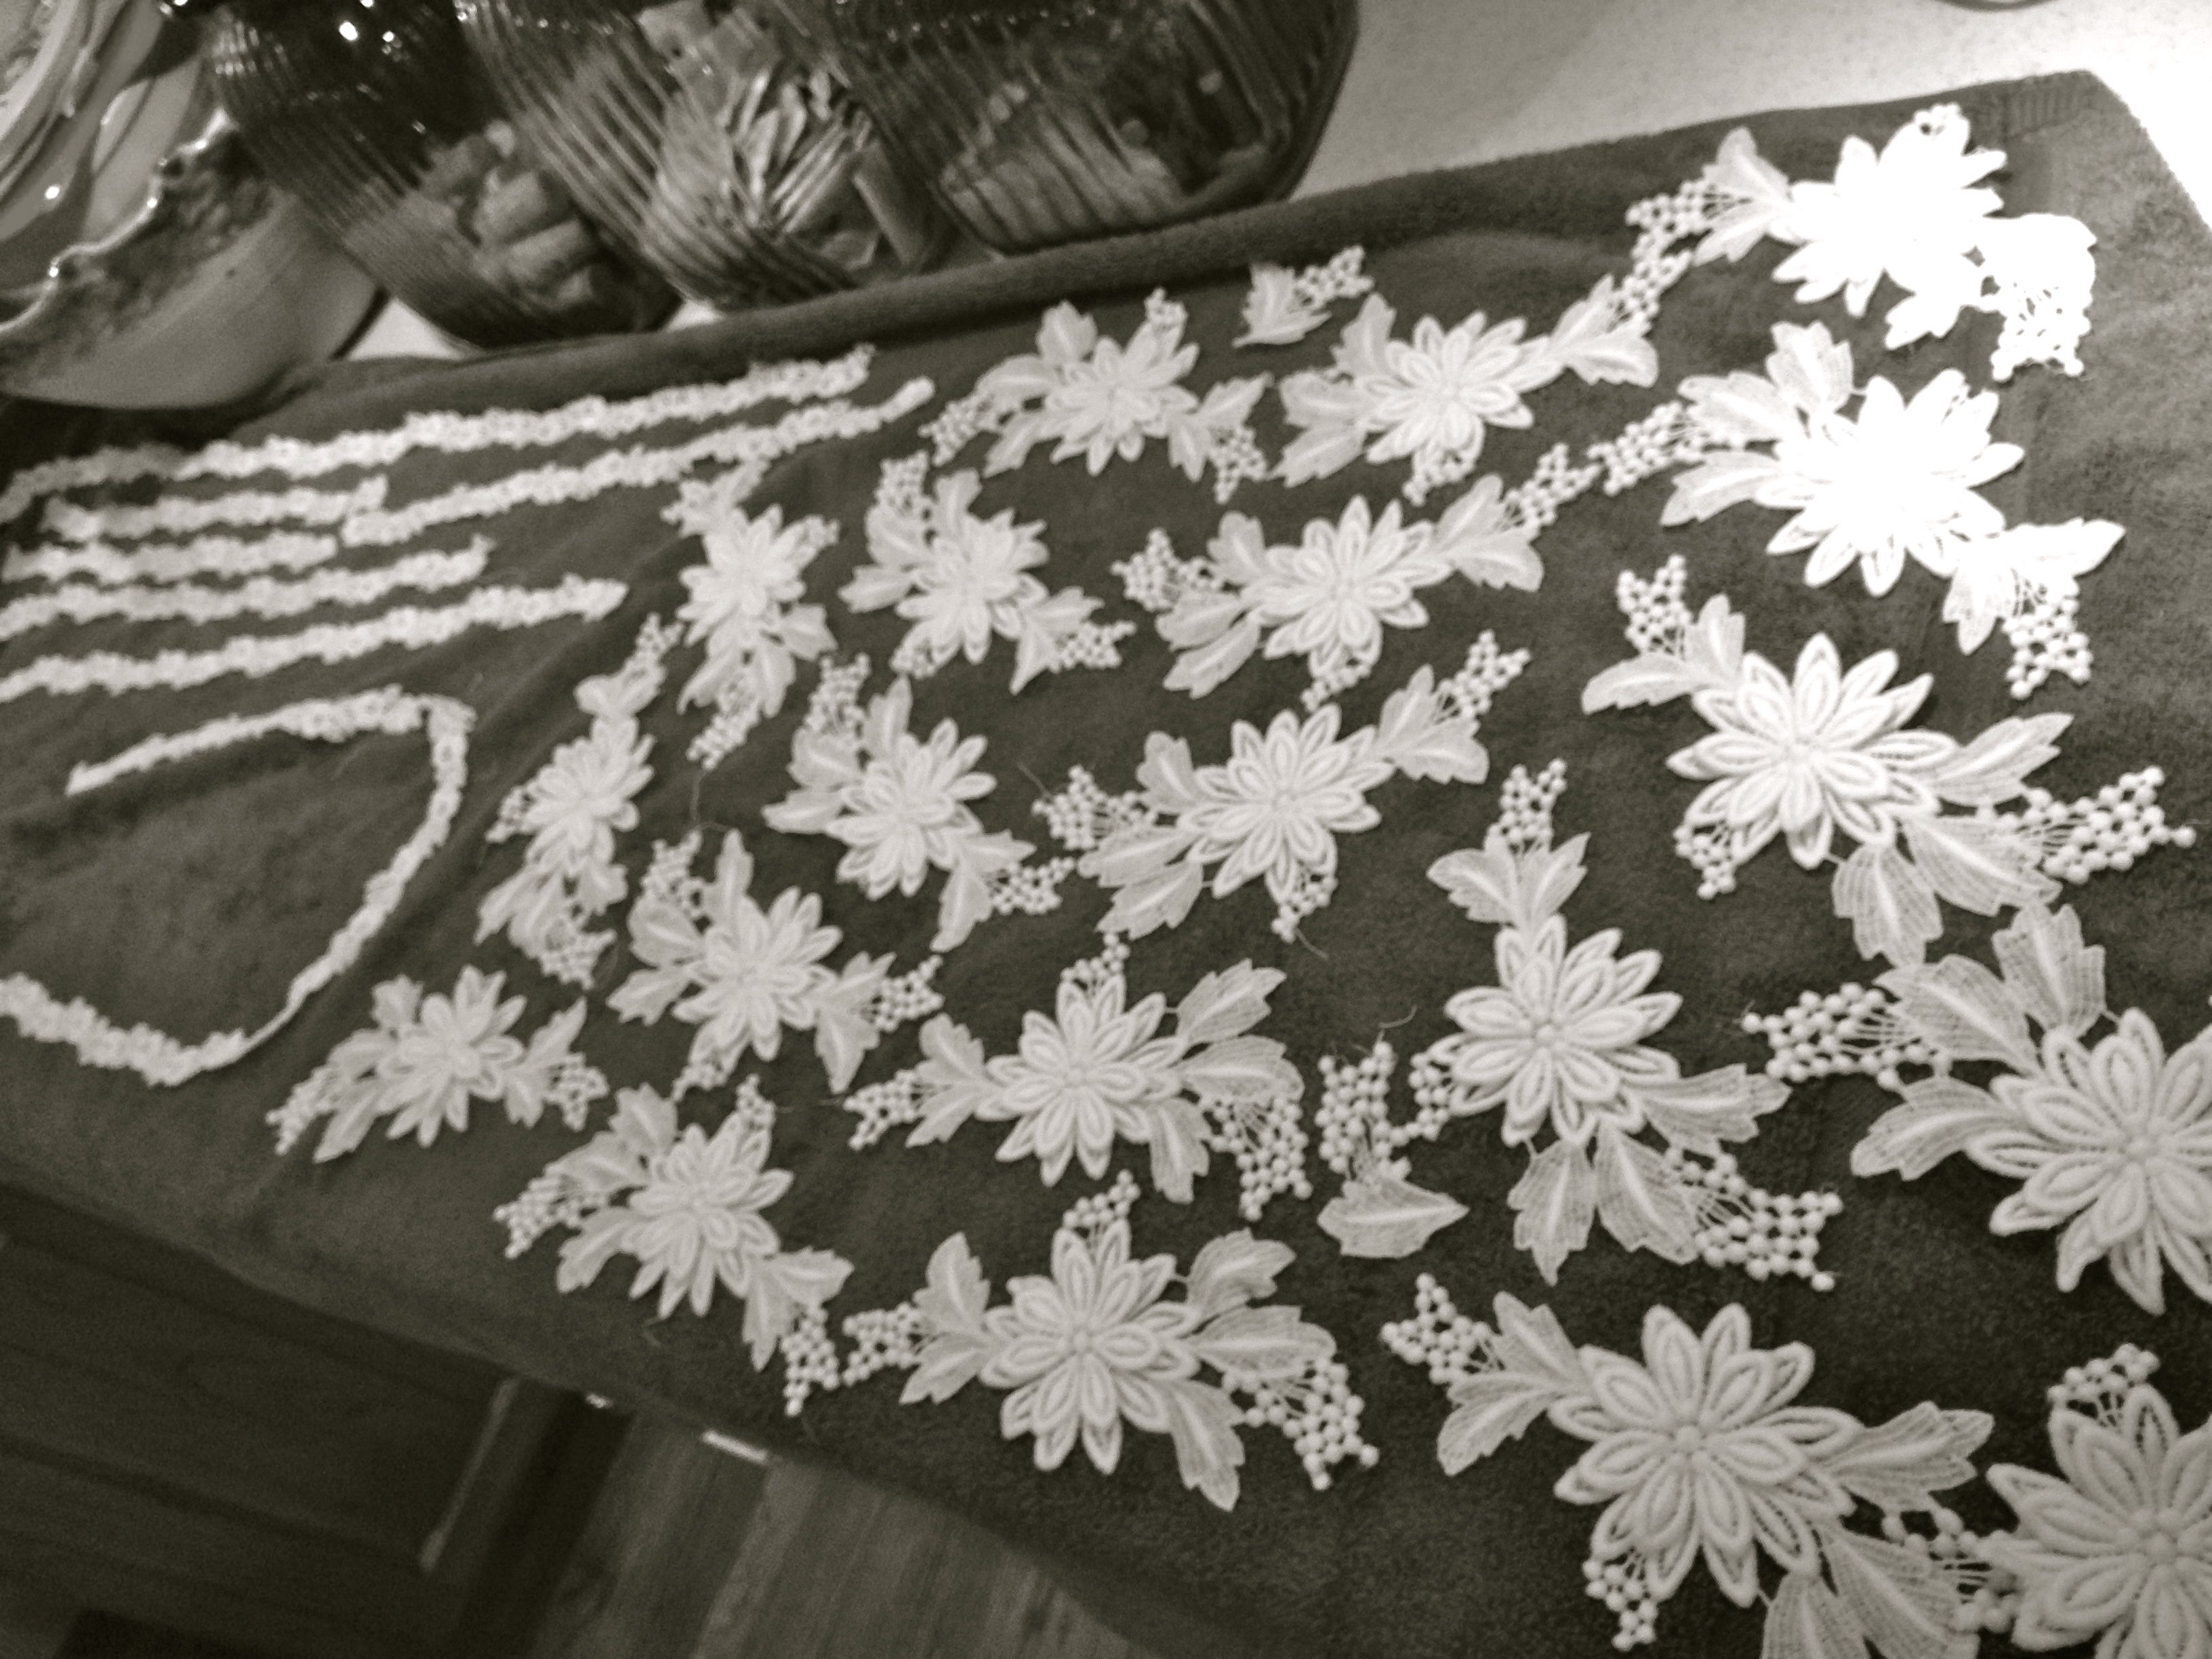
This Biz stuff is pretty awesome. It took off almost all of the dingy stuff. I loved seeing all of the pieces laying out to dry. It was quite amazing how much detail was put into this dress.

That night at home, the dress and lining got a Biz bath in my bath tub. I couldn’t believe how dirty the water was once I took the dresses out.

It took them quite a while to dry. My bathroom floor got really wet.
So far what I have done was pretty easy, but I knew the hard part was quickly approaching. Not too quickly. I had a few months to get this completed, but I couldn’t hold off forever. There were many days when I pulled out the dress and the pattern and decided it would be a good day to start. Then I would think, “If I had just one glass of wine I would be a little more relaxed and probably way more focused on cutting straight lines.” Then I would perhaps have that glass of wine and think, “What was I thinking. I can’t drink and sew. That’s absurd.” So another day would pass and I wouldn’t have started.

I got the giant dress all laid out and pinned the pattern pieces to it. It was like a puzzle trying to figure out where to cut the pieces from. I knew there could potentially be some weird seams different places in the skirt, but I managed to line it up so there was only 4 seams; the two on the sides and one front and back center.
 After cutting and sewing this together I swore of ever working with slippery fabric again. Not only does it move, but there were 2 layers to cut and sew through so it moved way more. I might have used an excessive amount of pins to hold everything together. I couldn’t be too cautious while working on this project.

I also had to use the liner to be the liner of the new dress too. It did feel like yucky plastic, but I was determined to only use this dress and not add any new fabrics to this project. I cut off the tulle underneath and puzzle pieced the pattern together on this too. It was more difficult because this dress was shorter and had much less fabric to work with. I had to get creative and ultimately the liner of the new skirt was not quite as full as the outer layer.
After I made the initial shell of the dress, I installed an invisible zipper. Zippers are the most difficult thing in the world to me. I feel like I can do so many things, but not this, no matter how hard I try. It only took me 2 tries to get it lined up correctly and I was thankful for that. I might have given up if I had to try again.

Now it was time for the interesting part. I started to put the appliqués back on this dress. I pinned them to the front in a shape that I thought looked nice and I had Kat come over for a fitting. At this fitting I made sure the bottom of the dress was even all the way around and I made the straps for the back of the dress. At this point it was totally backless and I pinned appliqués together to make it almost like a racerback, but kind of like and “x” shape.
After this fitting I carefully sewed all of the appliqués together. I also added snaps various places to make sure she could get in and out of the dress. And I added the scalloped trim from the bottom of her mom’s gown to the bottom of her fun dress. Since the dress was so short, it helped weigh it down a little bit, and it also looked great.

The last thing I made was headpieces. The small one was for her wedding dress, to be worn with her birdcage veil, and the bigger one for the reception dress.
I was finished and sworn to secrecy. Many people knew I was making this dress, but I wasn’t allowed to show anyone. I didn’t even take pictures of it because I knew I was too excited and I would slip. The bad part is she didn’t end up keeping a secret. She showed her mom the surprise. I guess I wasn’t the only excited one.

Before I show you the finished product, I just wanted to show her mom from her bridal portraits. She is still just as lovely today!

Ta-Da!!! Here is the dress from the front and the back. I loved how it turned out.

Here we are at the wedding. I love these pictures of us. She is such a special friend!
The wedding was absolutely perfect. It was an amazing (and hot) day, but mostly amazing. It was so much fun celebrating with her, her new husband and daughter, and her awesome family and friends. I wish everyone this easy of a wedding day. I also wish them the amount of love shown.

What an amazing transformation! Skill, meticulous attention to detail, and love made this an outstanding project. Way to go Sammie!