Valentines – Upcycle love

Standard

I can’t get no loving anywhere else so I guess I’ll love up on my clothes! I’m just kidding. There is tons of love in my life, just not currently coming from a romantic relationship. I know I’m where I am supposed to be. I’ve learned that love is far too complicated to understand and that I’ll just keep loving how I love and it will be the right thing. I know my plan is far bigger than I can even wrap my head around and I know that I’m not the one in charge. So for now I’ll get my love where I can get it and a whole lot of it comes from my family and friends.

This is an up-cycle post, and I will get there, but I want to start somewhere else first. I have to admit that I am one of those crazy women who are all about the LuLaRoe craze. Now I don’t have 35 pair of leggings or 25 shirts or anything to that extent, but I am a fan of the brand and have multiple pieces. Yes I think the leggings are incredibly soft, but no I don’t think they feel like butter. Butter is gooey to me and leggings are solid and not melty. My entire life I’ve been told that my clothes don’t match and then here comes LuLaRoe. They encourage pattern mixing and crazy prints and colors. I’m over here like I’ve been trying to show you how cool these crazy patterns and colors are for years now. I’m glad the rest of the world (well a lot of people) are finally on board with pattern mixing. I feel like I’ve been trying to get these weird trends going for years now or at least getting people to accept my personal style and now it’s finally happening. People are embracing and celebrating their inner wacky style and I love it. And one more note…If one more person tells me that $25 is too much for leggings I am going to hand them a mirror, turn them around, and let them see their underwear shinning through their $15 dollar leggings. And for someone who doesn’t really like to wear jeans, $25 isn’t that much for what is essentially a replacement for them in my particular wardrobe.

I told myself I wouldn’t buy Valentine’s leggings and that holiday leggings were ridiculous, but I was having a rough day and I was perusing some online groups for what was maybe a little bit of a retail therapy session. There they were. The red leggings with white hearts. The only Valentine’s leggings that I’d seen that I really liked. I didn’t have to fight for them. They were just there and no one had claimed them yet. I made myself wait 5 minutes. Was I being ridiculous? While I was waiting I came across an oversized black and white stripe classic t-shirt. This was actually something I’d been looking for for about 2 months. I didn’t feel ridiculous about quickly typing sold in that comment box. I’d been waiting on that. Then I realized how cute of a pattern mix that top and those leggings would be, so I bought them both. My best friend informed me that it had been a full moon and she had done some retail therapy that night too. Maybe it was the moon, maybe it was my blue feelings, or maybe it was just the most adorable outfit fell onto my computer screen and I hadn’t done anything for myself in a while. Either way I scored both items.

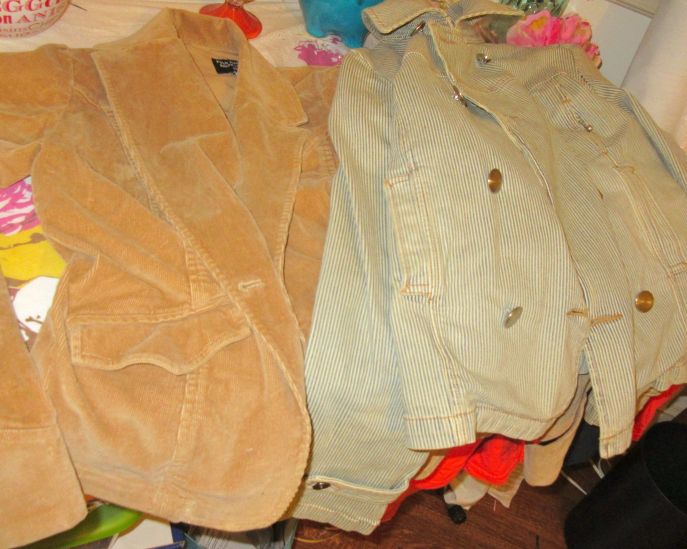
They arrived and I was super happy with my decision. As I was digging around my craft supplies I found a black and white stripe maxi skirt that I had purchased for $3 at a thrift store. It was super cute, but a size small. I mainly got it for the fabric, but when I saw it I knew it would be a part of my Valentine’s outfit. I would use it to make a long vest that is similar to the LuLaRoe style joy. I don’t own a joy because they are mainly lace and I’m not a huge fan of lace vests. It’s odd because I love lace.

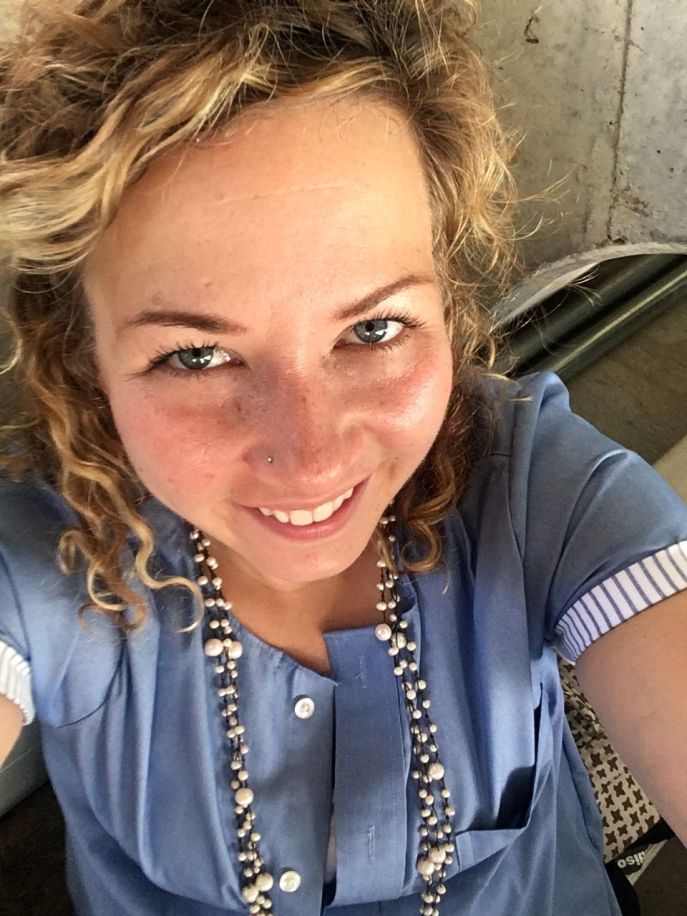
(Please forgive my pictures in this post. They were all taken on my phone and not with a camera. Also, it’s really hard to see the details on such a dark piece.)

bw1Here it was in the beginning. Pretty simple. Basically a straight skirt with a roll down waist. It was soft and stretchy and perfect for my vision.

bw2

The first thing I did was remove the waist band. Then I cut the skirt all the was down the front. Here it is laid all out on the floor.

bw3

I used a vest I already had to help measure where I wanted the arm holes to go. I actually cut the holes bigger than the original vest because I wanted this one to be a little bit baggier and looser of a fit.

bw4

This is what it looked like after I cut the arm holes. Now onto some sewing…

bw5

I started by finishing the edge that would be the opening in the front. I turned the hem under and sewed all the way down the front (where the red lines are). Make sure if you are sewing with stretchy fabric you use a stitch that will stretch. I use a zig-zag stitch and a needle specifically for stretchy fabric. At this point I could have turned the arm holes under and sewed them, but I waited. It may have been easier at this point.  On the diagram there are two purple circles. These are around the fabric that will be the front of the vest. I wanted this fabric to be ruffled. I sewed a straight seam across the small section and pulled the thread to scrunch the fabric.

bw6

After I scrunched the fabric, I lined up the top of the vest at the shoulders. I sewed the pieces together and created the shape of the top.

bw7

Next I turned under all the fabric around the arm hole and sewed it down. I also did the same for the back of the neck creating a bit of a rounded edge.

bw8

To finish this vest I wanted it to have 2 slits in the sides that went to the hip. I used a seam ripper to take out the current seem and then just folded the fabric down and sewed along both sides to finish it off.

before-and-after

Here is a side by side of the before and after. I think I will get a lot of use out of this transformed piece.

unnamed-2

I really liked this vest with my 2 LuLaRoe pieces I had purchased to wear for Valentine’s day. Not too many things are better than black and white stripes, but I think 2 sets of stripes is pretty snazzy!

unnamed

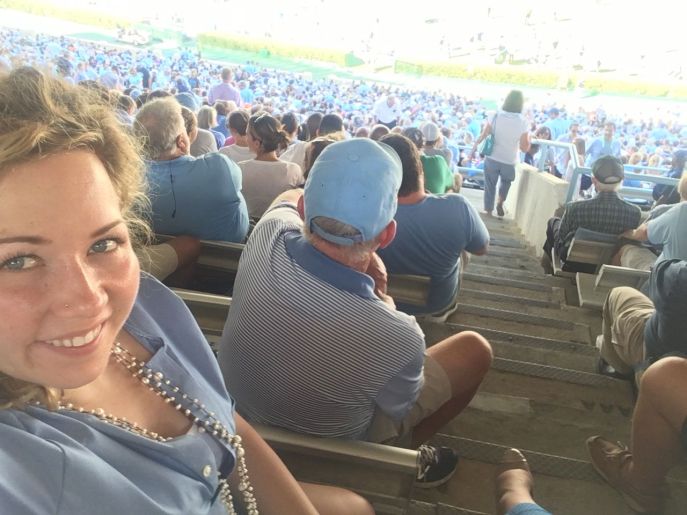
Check out my date for the day. This girl is my love!!! In true girl fashion she insisted on me buying her dinner for the holiday. Honey please! I buy your dinner every day.

unnamed-4

Feeling a little something-something in this vest. A little feisty-ness perhaps.

unnamed-3

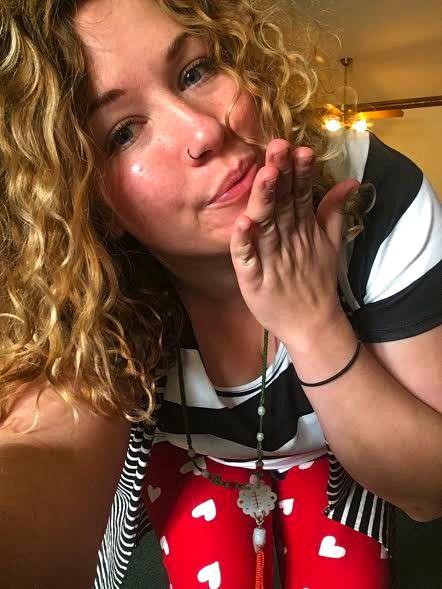
And of course a kiss to send you off. I hope you had the most lovely of Valentine’s days. I hope the day was filled with love, hugs, kisses, candy, and kindness. I love you all!

Football Fashionista

Standard

Every once in a while artists and creators hear some great words that sound a little bit like, “Make whatever you want.” For real? I don’t have limits? Maybe a few limits, but I was granted creative liberty on this particular project, and I was so freaking excited! (If you couldn’t already tell.)

I love up-cycling and I love making children’s clothing. I think both can be super creative, fun, and don’t have lots of rules! Children’s clothing allows for much more cuteness and freeness than adult clothing. I was commissioned to make some pieces of clothing for a little nugget and here is the story…

There is an uncle who is a high school football coach and there is a niece that attends almost all football games. The uncle has lots of t-shirts representing the school so the mama asked me to make some cute stuff for the nugget to wear to the games out of the old t-shirts. Most specifically she wanted some warmish items (for chilly nights) and maybe some dresses (because that’s kind of my specialty).

img_1343img_1344

Here are the starting supplies. Tons of shirts from her uncle and 2 jackets from her mama. I made 4 pieces and here they are.

1- For the first piece I used the most vintage looking t-shirt and the corduroy jacket. I felt I could play on the vintage feel with these 2 items.

1st-dress

Along with the vintage feel of the fabrics I tried to choose a classic shape. Fitted at the top and looks a little bit like a jumper and then more full at the bottom. I thought it was kind of classic/preppy/football seasonal looking.

Check out these cutie details – ruffles and elbow pads!!!! Makes me smile!

2- For this dress I used a shirt that was designed by her uncle, so I wanted to used the whole design of the shirt and include the last name on the back.

2nd-dress

I’ve made lots of t-shirt dresses so I kind of kept my usual shape with this one. It was easy to pull from knowledge I already had, plus I was able to keep the full design of the shirt. It’s basically an A line dress with short sleeves and a ruffle bottom. I wanted at least one short sleeve item for her to wear while it’s still warm outside. You can always layer later.

I attached the sleeve almost like a baseball tee would have the sleeves attached. I was able to make the best use of my supplies by doing it this way. And the ruffles – a perfect addition to all little girl clothes.

3- This is where I went wild and totally didn’t follow the guidelines, but it’s my favorite of the 4 pieces and I’m glad I veered off track. When it’s chilly outside you have to cover up your cute clothes with a jacket, so why not make a jacket?

jacket

I mostly used one of the jackets for this project. I sized it down from adult to basically a 5T, created a stand up collar, used excess for a ruffle bottom, and lined the sleeves for a pop of orange as they roll up. For the back I used iron on interfacing to make a giant stiff patch that was then sewn into place. I made bows for the front and used the original buttons from the jacket.

I know I’ve already told you how cute ruffles are, but seriously??? I can’t even handle this. It really is one of my favorite up-cylce projects that I’ve ever made. I don’t want to be a cougar, but I would totally rock a jacket like this in my size! I’m very proud of this one. (Okay…I’m proud of all of them, but this one really is the best!)

4- This was the most simple of the pieces and it was created from the same t-shirt used in the jacket and then scraps from the navy dress.

img_1369

It’s a simple, sweet, elastic waist pull on skirt. It’s soft comfy and will look great pulled up high on her waist or sitting more on her hips. It would look pretty with the jacket or just a plain t-shirt. Tights look adorable with skirts and so do suspenders.  It’s mainly just a little something that she can probably wear this year and next.

Hello football fashionista! This kid might be the best dressed cougar at the games. My mom made clothes for me and my sister growing up, but not too many kids get the opportunity to have someone make custom clothes for them. I always felt so special having my “own” clothes that no one else had so making kid’s custom pieces is so exciting. You get to allow a child to feel super special and unique! I heard she put them all on for a fashion show at the house and modeled like a champ! I know she will be knocking everyone’s socks off at the games!

I know you already know from my previous excitement that this was fun for me. Seriously it was a blast! One night at around 1 am I had to force myself to go to bed but I didn’t want to stop working. It’s been a while since I’ve really thrown myself into a project with that much gusto. Maybe this was just the change up I needed to get me re-excited about all my projects. It really has been a bit of a kick in the butt to get me going again. I’m thankful for a friend and her daughter who trusted me to “make whatever I wanted”. It’s always nice to have someone trust your judgement and it’s always nice to let loose and have fun with sewing. This project was definitely fun! There were some t-shirts left over, so maybe there is more of that in my future. ; )

Carolina Girl-Game Day Ready

Standard

In my last post I had made a dress out of one of my dad’s old shirts. I wore it to church last Sunday and had tons of compliments. Some of those even came from people who hadn’t seen the blog post or known that I had made it. I don’t know about you, but it makes me feel good when someone compliments my outfit, and it makes me feel even better when the compliment is directed at something that I have crafted myself! I really loved wearing it. It is super comfortable, but not sloppy. It was a little bit structured and a little bit loose and still had some girly elements to it.

I had an event coming up (which has past now because I just got home from it) and I wasn’t planning on making anything to wear. I didn’t really think I had time and I figured I could just wear something I already had. But like always…the crazy kicked in and I knew, while I was at church, I wanted to make another of these dresses to wear. I left church, checked the time, and hurried over to the thrift store. I knew exactly what I wanted. Well, almost exactly. I knew it needed to be a shirt that was carolina blue and big. They had exactly what I needed, and I actually headed home with 2 shirts.

img_1375

Here we have the 2 lovely shirts. Please ignore the wet hair and pretend I look decent in this photo. I was on a time crunch and had to take the photos when I could.

img_1377

First things first – cut off the collars and the cuffs and store them for an awesome project one day. I actually have a whole little tote container of them. Let me know if you have any ideas. I’m still waiting on something great to pop into my head.

img_1379

I cut off the sleeves as close to the seam as possible as to save material. I didn’t take them time to seam rip it because I knew I would make a new arm hole anyways.

img_1380

I put the shirt on and determined where the new shoulder would be. I also put some pins under my arms to try and figure out where the bottom of the new arm hole was going to be. This is honestly the hardest part because….men’s shirts have gigantic arm holes and women do not typically have quite as giant arms or need as much room. The smaller you make the arm hole the tighter you are making the shirt across your chest. It’s not too bad for me because I don’t have much in the front to consider, but I also didn’t want the shirt bulging open at the buttons. Unfortunately I didn’t make them the correct size. I pulled the shirt too tight, but keep reading and you will eventually see the solution.

img_1381

After marking the new arm holes I cut the seams down the sides of the shirt. I used the cut off sleeves to create a new more feminine sleeve. It attaches more at an angle instead of straight out and has more of a curved line than a men’s sleeve would.

After the sleeves were sewn to the shirt I then sewed the sides back together all the way down. I sewed on an angle down the side of the shirt so the bottom of the dress would still be full and the top more fitted. It I guess was kind of an a-line.

img_1382

I used fabric from the other shirt to create a cuff for the new sleeves. It just gave it a cute little finished touch on the sleeve and some contrast.

img_1383

Because button down shirts are curved at the bottom they make awfully short dresses when you hem them straight across. I used fabric from the other shirt to add a few inches of length to the bottom of the dress. I loved the blue and white accents on the bottom and on the sleeves.

After I finished the bottom. I finished the neck line by just turning it under and stitching it down. I worked great on the last shirt dress and this one also.

img_1392

Here is the finished project. The event was a Carolina Tar Heels football game and my dad’s fraternity reunion weekend. (I’m sorry for the quality of this picture. I took it in the hotel room and thought it looked fine until it was on my computer and it didn’t look very fine at all, but it’s the only fully body pic I took this day.) I wanted to make a dress for this because I knew it would be a hot day and a dress would be cool and comfy. You can see that my solution the the tight armpit holes was to just add a tank underneath and leave a few buttons open. I like how it turned out and I even liked how it looked with open buttons at the top.

img_1397

This dress went great with morning Bloody Mary’s…

img_2821

And this dress also went well with afternoon pre-game beers!

img_2890

We made it to the game and I took a stadium selfie to prove it. It was hot and I was a little sweaty at this point, but feeling comfy in my dress. I did sneak in a little nap during the 2nd quarter. Football is long and I was tired from partying with the guys from the night before. You might not should be jamming to Janis Joplin with your dad’s fraternity brothers at 2:15 in the morning when you know you have a long day the next day. It was fun though!

img_2893

Here is one last picture to prove that I was actually at a live sporting event since at least one person was convinced that I would not go. Haha. Maybe I shouldn’t tell people how much I dislike sports. I’m not big on sports at all but this entire weekend was great and even the game was fun. It’s always more fun when you win!

My Little Mermaid

Standard

Sometimes I ask myself, “Why did I agree to do this?” But this time I can’t ask myself that question because it was basically my idea and I volunteered for it. It wasn’t too bad and was actually mostly fun.

A few months ago my sister and I stumbled onto an old beat up prom dress that was probably never going to be worn to a prom again. It was teal and beaded, and very pretty at one time. I mentioned to my sister that it looked like a mermaid tail and that is where the idea was born. My niece would be a mermaid for halloween. We tossed around some ideas about the construction of it but dropped the ball for a little while.

Time went on, Halloween was quickly approaching, and that meant it was back to the mermaid drawing board. The biggest dilemma was what to make a shell bra out of, but we found a solution. On a girl’s day visit to our favorite dollar store we stumbled upon a mermaid toy. In the pack was a mermaid, hair trinket thing, star fish, and a clam that opened like a compact. You know, it was one of those little junkie toys that kids beg for and then they loose all the pieces that day. The clam was the key! It was basically perfect size for a 2 year old bra top. (I don’t know why it feels so weird to say a 2 year old bra. haha)

IMG_0743

Here are what the shells looked like after I broke them apart. It wasn’t very difficult. I just cut them with regular scissors.

IMG_0745

The base of this costume is a nude leotard and I knew just glue wouldn’t hold the shells on because they are hollow in the middle. I used a nail to poke holes near the edges of the shell so I could sew them on to the leotard.

IMG_0747

Now it’s time to decorate the shells. I covered them with mod podge and then sprinkled glitter all over them. When they dried, tons of the glitter was falling off so I repeated this step to ensure that even if glitter was lost they would still be covered.

IMG_0751

Sparkly shells will make the perfect Ariel bra top. They are gorgeous, but I might be finding glitter in my house 10 years from now. You know you can never get rid of it. It’s a curse!

IMG_0755

I had my little Tater-Tot try on the leotard and marked where the shells needed to go. I then sewed them into place. (We ordered this leotard from Amazon. It is made by Eurotard.)

IMG_3231

IMG_0759

I then turned to some of my dance costume making supplies to finish the bra top. I used E6000 to glue crystal ab rhinestones to the shell and in-between to hook the 2 shells together. I also used some purple beads, and purple ribbon to finish off the bra. I’m starting to think this looks more like a “Dancing With The Stars” costume than a little girl’s Halloween costume.

IMG_0752

Here is the prom dress I used for the bottom. You can see that there are tons of beads missing. What you don’t see is how someone has washed it incorrectly and the lining is messed up. It’s good that these things don’t matter for this project.

IMG_0754

I cut out the shape of the skirt and began to sew it together. I was cursing myself at this point. This part sucked majorly, and the sad part is I kind of knew that before I started. I broke 4 needles working on this, and I was being what I thought was extremely careful. There are probably some tips on how to sew beaded fabric, but I didn’t look any up, and I never want to sew beaded fabric ever again!

IMG_3234

I used 4 colors of tulle to make the little ruffle around the waist and the tutu on the bottom. I then used elastic in the back of the skirt to hold it up and on the inside of the bottom to synch it together for the mermaid effect. I couldn’t make it too tight. I wanted her to be able to walk.

IMG_3236 IMG_3237

Here it is! I finished late on the night before her 1st Halloween party at her dance class. I was crossing my fingers and hoping it fit perfectly. My sister did have to add a safety pin to the waist. The skirt is pretty heavy and the elastic was not quite tight enough, but no one really knew about that part.

As much as we thought it would be hilarious to put her in a red Ariel wig, we knew she wouldn’t keep it on. My sister said she wasn’t wasting money on that part. I made her a hair clip out of the star fish that came in the stupid mermaid toy. I covered it in glitter the same way I did the bra top, added stones, and a clip to the back. This kid refuses to wear a hair bow, but left the starfish in the whole time. I think she really loved her costume (even though 2 days before she said she was going to be Anna, and then she said she wanted to be a girl…2 year old logic?)

IMG_0765 IMG_0770

Look at that model. So proud of her costume.

IMG_0778

There is my beautiful girl!

IMG_0775

Her mom bough her some Ariel high heels from the Disney store. I realized that even though she liked her costume, it was these shoes that were her favorite part. This kid might turn into one of those girls that can do anything in heels. She can already run and jump in them. We might be in trouble.

IMG_0789 IMG_0792

This is her demonstrating how she can jump and run.

IMG_0803

This is her picking out her poses for pictures.

Yoga anyone?

IMG_0805

And now she is showing off her needle. Not a good outfit for this particular move. It’s not slowing her down at all.

IMG_0809

This is where she posed when we told her not to go up the stairs. She’s a smart girl!

I love this little mermaid more than anything. She does drive me quite crazy at moments. I know 2 year olds love to exercise their opinions because it’s like they’ve just realized they have one. Sometimes I think she just wants to have a different opinion from me and sometimes I think she might be bossier than her mom, but she is sweet, loving, caring, and full of life and excitement. I think Ariel was the perfect costume for her personality! Just a little bit spunky, sassy, and stubborn…Just like her!

1st Birthday Princess

Standard

Little girls can be lots of things. They can be messy, bossy, silly, funny, pretty, playful, rambunctious, creative, happy, etc…. And, little girls can be princesses! What better day to be a princess than on your birthday?

This particular post is about a princess on her first birthday. Well, it’s mostly about what she wore for her first birthday. This little girl is a bright eyed doll with a mommy who loves to dress her up. She is so stinking cute. I would want to dress her up too.

The mom wanted something special for her to wear for her birthday, so she approached me with some ideas.

12033410_814916785288895_228266653_n

This was the first image she sent me. It’s cute.

12026625_814916965288877_1149680139_n

But she wanted the sleeves to be more like theses.

When I first saw it, I thought that is pretty stinking cute, but then I had a problem with it. Sequins can itch and even hurt some kids. As a dance teacher I am fully aware of how they can cut up sensitive skin. I knew that I didn’t want sequins against her sweet baby skin. That meant I would have to make a few adjustments to the design so that she wouldn’t get all scratched up.

I hit the fabric store and found the sweetest pink material. It was soft and I knew it would feel good to wear. I couldn’t find any gold or sequin that I liked. Then it hit me. I had some gorgeous gold/champagne sequin left over from last Christmas. It would be perfect for this project because it would help this romper look less like a dance costume and more like a dressy outfit.

I got to work. The shape is almost identical to the shape of the romper I made for my niece’s 1st birthday and almost the exact same size, so I used the pattern I made for that. I started piecing it together and came up with a plan so the sequins wouldn’t touch her. I trimmed around the edges of the legs and the top with pink so she wouldn’t get cut.

IMG_0724

From the front.

IMG_0725

I love these sequins.

IMG_0727

Criss-cross straps that hook in the back .

I think it turned out pretty great! I love the pink and gold together. It looks very special and very princess like. The little girl’s aunt made her a crown to wear and her mom adorned her with jewelry and the cutest gold shoes. Here are a few pictures from her photo shoot. She looked beautiful! Plus, the photos are awesome since her dad in the photographer.

12064128_826202814160292_820309342_n

12166958_826195034161070_474907687_n

12165906_826195134161060_1269919707_n

12166631_826195104161063_2120701840_n

12166602_826202650826975_2031204933_n

I think she makes a great princess. What about you?